Saturday, February 6, 2010

Moraccan Nights

This Tutorial was written on Feb. 5th, 2010. This is my own creation, using Template by Elegantly Wasted and Scrap Kit by Baby Cakes Scraps.

◘

§ Supplies Needed §

•

♦FTU Template 0012 by Elegantly Wasted HERE

♦PTU Scrapkit Moraccan Sunset by Baby Cakes Scraps HERE

♦Tube of Choice. I am using the beautiful work of ©Keith Garvey HERE
♦Font of Choice I used Al Sandra HERE

◘

§ Notes §

•

This tutorial assumes, you have a working knowledge of PSP.

◘

§ Lesson §

•

~Open Template, duplicate and close orginal.


~Resize Canvas 800x800, Delete Copyright.


~Go to 10 Blur and Selections>Select All>Float>Defloat.


~Copy paper three and paste, resize 70%. Selections>Invert, delete. Ctrl + D, delete 10 Blur.


~Do the Same with 10, Add DS 0,0, 60, 8.00, and delete 10.


~Go to Dots and Selections>Select All>Float>Defloat.


~Copy Paper fourteen and Paste, resize 70%. Selections>Invert, delete. Ctrl + D, Add DS and Delete Dots.


~Go to 9 Blur and Selections>Select All>Float>Defloat.


~Copy Paper Four and Paste, resize 70%. Move Paper to the Right.


~Selections>Invert, delete. Ctrl + D, delete 9 blur.


~Do the same with 9, add DS.


~Go to 8, Selections>Select All>Float>Defloat.


~Copy Paper eight and Paste, resize 70%. Ctrl + D.


~Do the same with 7, 4, 3 & 2. Alternating different papers from kit.


* 7 - Paper Two

* 4 - Paper One, lower opacity to 42

* 3 - Paper Three, lower opacity to 42

* 2 - Paper Eleven, lower Opacity to 68.


~Delete the word Beautiful Night, both star layers.


~Using Magic Wand. CLick inside layer 1. Selections>Modify>Expand 4.


~Open Tube, duplicate, close orginal and go to Image>Mirror.


~Copy and Paste above Raster 7. Selections>Invert, delete. Selections> Invert. Change Blend Mode to Luminance (L).


~Copy Canna and Paste, resize 60%. Selections>Invert, delete. Ctrl + D, Add DS to tube and flower.


~Add DS to Frame.


~Go to Raster 2 and Selections>Select All>Float>Defloat.


~Copy Sequin Spill and Paste, resize 60%. Place in Marching Ants. Selections>Invert, delete. Ctrl + D.


~Back to top layer.


~Copy Bling doodle and Paste, resize 50%, Add DS and place to the right.


~Copy Tube and Paste, resize if needed. Add DS.


~Copy Purple bird and Paste, resize 40%, add DS.


~Copy Blossom and Paste over tube, resize 60%, Add DS.


~Add Name and Copyright


~Resize 400x400px and save as.png.

Now I lay Me Down

This tutorial was written on Jan. 29th 2010. Little Late posting. Please do not copy this tutorial in any way.
◘
§ Supplies §
•
♦PSP 9 (any newer version will do)
♦PTU Scrap kit The Prayer by Tootypup HERE
♦EyeCandy 5 Glass HERE
♦Mask of Choice
♦Word Art HERE
◘
§ Notes §
•
This tutorial assumes you have a working knowledge of PSP.
◘
§ Lesson §
•
~Open a New 800x800 Transparent Image and floodfill white.
~Copy Cameoframe1 and Paste, resize 60%. Using Magic wand, click inside the outer part of frame. Selections>Modify> Expand2.
~Copy Paper15 and Paste, resize 70%. Selections> Invert, delete. Ctrl + D, move under frame.
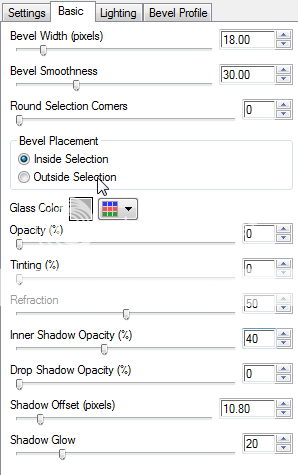
~Add EyeCandy Glass. Use the following settings (Choose Clear, No drop Shadow).

~Do the Same the same, with the swirls of the frame. Using Paper 10.

~Merge Down with other paper layer. After applying Glass effect, lower Opacity to 80.

~This will give a stained glass look.

~Add Drop Shadow to Frame 0, 0, 40, 4.00.

~Copy Paper3 and Paste above background layer, resize 70%. Appy Mask, Merge Group.

~Duplicate, Mirror and flip.

~Copy Vine and Paste, resize 15%, Add DS. Move to the Right of frame.

~Copy Lordsprayer2 adn Paste, resize 25%. Using Raster Deform Tool, turn to the left slighty. Adjust>Sharpness>Sharpen. Add DS.

~Copy Leafdeco2 and Paste, Resize 50%, Move below the scroll.

~Copy Praying1 and Paste, resize 60%. Place above scroll.

~Copy Prayer4 and Paste, resize 60%. Duplicate, move this below the frame.

~On Orginal Poser erase the legs. DO the same with the duplicated. It will look like the legs are under the frame.

~Copy Word Art and Paste and Move above the Frame Layer.

~Put name and Copyright info.

~Crop and save as .png.

Thank You for trying my tutorial.

Tuesday, January 26, 2010

After The Rain

This tutorial was written by me, on Jan. 26th, 2010. This is my own creation, using Scrap kit by Brandie's Eye Candy. Please do not copy this in anyway.
◘
§ Supplies §
•
♦PSP 9, any newer Version will do
♦Animation Shop HERE
♦PTU Scrap kit "After The Rain" (Posers included by ©LisaK) by Brandie's Eye Candy HERE
♦Mask17 by AquaRebel 315 HERE
♦Eye Candy5 (6 has the same effects): Impact, Gradient Glow & Nature, Water Drops HERE
♦Font of Choice, I am using Al Sandra. It can be found on Fonts101 HERE
◘
§ Notes §
•
This tutorial assumes you, have a working knowledge of PSP and AS.
◘
§ Lesson §
•
~Open a 800 x 800, Transparent Image and floodfill white.
~Copy Paper16 and Paste, resize 70%.
~Apply Mask, Merge Group. Duplicate Once, for a total of 2. Rename mask1 and mask2 (from bottom to top) X out 2.
~Selections>Select All>Float>Defloat.
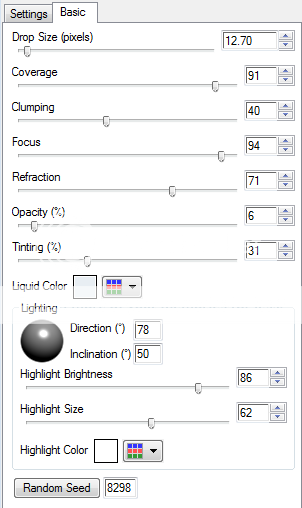
~Apply EyeCandy: Nature/Water Drops with following Settings, to Mask1.

~X out Mask1 and Un X Mask2 and Change Random Seed. Apply to Mask2.
~Ctrl + D
~Copy Frame3 and Paste.
~Copy Daisy1 and Paste, resize 50%. Add DS 0, 0, 60, 6.00 (this will remain the same with all).
~Copy Fleur and Paste, resize 50%, add DS.
~Copy Doodle and Paste, resize 70%, place under flowers, add DS.
~Copy FoldedandCurledRibbon3 and Paste, resize 70%, add DS. Use my Tag for placement.
~Copy Butterfly2 and Paste, resize 50%. Place over Flowers, add DS.
~Copy Heart CircleBling and Paste, resize 60%, add DS. Move this under the Frame.
~Using Magic Wand, Click inside the Frame. Selections>Modify>Expand 6.
~Copy CookiePoser2 and Paste. Selections>Invert, delete. Add DS to poser and frame. Make sure poser is under frame.
~Open Poser1, using Selections Tool , set on Point to Point. Select just the poser. Copy, Ctrl + D.
~Paste and Resize 70%. Place on top Left of Frame, Add DS.
~Using Selections tool again. Go around the copyright. Copy and Paste on tag, resize 130%.
~Add Your Name and Copyright info. Crop.
~If not Animating, resize 400 x 400 and save as .png
◘
§ Animation §
•
~Copy Merged take to AS and Paste as a New Animation.
~Back in PSP X out Mask1 and Un X Mask2, Copy Merged.
~Take to AS and Paste After Current Frame.
~Ctrl + A, Animation>Frame Properties>30.
~Animate, resize 60% or 400x400 .
Save as .gif
Thank You for Trying my Tutorial.

Monday, January 25, 2010

Advertising Team


Love Is the Beauty of the Soul


This tutorial was written on Jan. 25, 2010. This is my own creation, using kit by JTsDesigns "In The Moment". Any resmblence is only coincidental. Please so not copy this tutorial in anyway.

◘

§ Supplies Needed §

•

♦PSP 9, any version will do. HERE

♦BettyFreakMask1 & WordArt (if this word art is, please contact me, I want to give proper credit) HERE & HERE

♦PTU Scrap Kit by JT'sDesigns "In The Moment" HERE

♦4 Tubes of Choice all by the same Artist (can not mix other artists).

♦EyeCandy 5: Gradient Glow HERE

◘

§ Notes §

•

All Drop Shadow settings will be 0, 0, 80, 10.00, Black, unless otherwise stated. This tutorial assumes you have a working, knowledge of PSP.

◘

§ Lesson §

•

~Open Template, duplicate & delete copyright.


~Go to Mask layer. Selections>Select All> Float> Defloat.

~Copy Paper16 and Paste. Selections>Invert, delete. Ctrl + D, delete Mask.


~Do the Same with the Scroll, using paper20, add DS. Delete Scroll.

~Do the Same to the doodle.


~Copy Frame2 and Paste, resize 60%, Move to the left.


~Copy Frame 1 and Paste, resize 60%. Move to the right.


~Click inside each of the frames of frame 2, using magic wand. Selections>Modify>Expand 6.

~Copy Paper3 and Paste. Selections>Invert, delete. Ctrl + D. Move under the frame.


~Do the same with the oval frame, using paper5.


~Copy CornerBloom2 and Paste, resize 60%. Position on the left upper corner, of oval frame, add DS.


~Copy Sunflower2 and Paste, resize 60%. Position on the lower right side of frame, add DS.


~Copy Sunflower 1 & 3 and Paste, resize 40%. Place on top of Sunflower2, add DS.


~Copy Hummbird2 and Paste, resize 70%. Adjust>Sharpness>Sharpen. Adjust> Add/Remove Noise>Add Noise. Uniform, 41%, Monochorome checked. Add DS.


~Copy Envelope and Paste, resize 70%, add DS. Move to the bottom part of frames in the middle.


~Copy BlueCandle and Paste, resize 40%, add DS.


~Copy WordArt and Paste, resize 60%. Add Gradient Glow: 12.78, 35, 100, 30, 100, 100. Add DS.


~Add Tube to each frame. Click inside oval frame, using magic wand.Expand by 6. Paste tube, Selections>Invert, delete. Ctrl + D, add DS.


~Do the same with the 3 other tubes and the smaller frames.


~Add DS to both frames.


~Add Name and Copyright Info.


~Resize 400 x 400 px., save as .png


Thank You for trying my tutorial.

Friday, January 22, 2010

Princess

This tutorial was written on, Jan. 22, 2010. This is my own creation using Template by Toxic Desire and Scrap kit by Wicked Princess.
◘
§ Supplies Needed §
•
♦PSP 9 (any newer version will do) HERE
♦Animation Shop HERE
♦FTU Template 24 (down right side of blog, under Templates) by Kristen @ Toxic Desirez HERE
♦PTU Scrap Kit called Simply Sassy by Wicked Princess HERE
◘
§ Notes §
•
This tutorial assumes you have a working, knowledge of PSP and AS.
◘
§ Lesson §
•
~Open Template and duplicate, resize Canvas to 800 x 800.
~Go to Lg. Star1. Selections>Select All>Float>Defloat.
~Copy Paper 18 and Paste. Selections>Invert, delete. Ctrl + D, Add DS -1, -2, 45, 6.00. Delete Lg. Star 1.
~Go to Lg. Star2 and do the same as above. Using Paper 12 and resizing 50%.
~Go to Rectangle, doing the Same as above, using Paper16.
~Go to Word Outline doing the same, using paper2.
~Go to WordArt1 and using Magic Wand. With these setting; Mode: Add shift, Match Mode: RGB value, Tolerance: 10, Feather: 0, Anti-Alias checked, Outside.. Click inside each letter.
~Add 3 New Raster Layers. Name them from top to bottom 3, 2, 1.
~Go to Foreground-Stroke and change to #e83769. Change Background-Fill to #fd97b4.
~Back to Foreground-Stroke, click on the Gradient tab. Look for Foreground, in the drop down menu. Change Angle to 35 and Repeats to 8.
~Floodfill 3, then X out.
~Change the Repeat to 6 and Floodfill 2, then X out.
~Change the Repeat to 4 and floodfill 1.
~Add DS to 1, 2, & 3. Delete WordArt1.
~On WordArt2, Selections>Select All>Float>Defloat. Add New Raster Layer and Flood fill black. Ctrl + D. Add Gradient Glow and DS. Delete WordArt2.
~Go to Stars & Heart. Selections>Select All>Float>Defloat.
~Copy Paper5 and Paste. Resize 70%. Selections>Invert, delete. Ctrl + D, Add DS. Delete Stars & Heart.
§ Embellihments §
(Use my Tag for Placement)
*Flower 1, mirror, resize 50%, Add DS.
*Glitter 1, 2 & 3. Placed Above Background.
*Bow5, resize 30%, add DS.
*Crown5, resize 25%, add DS.
*Flower8, resize 60%, add DS.
*Flower7, resize 40%, add DS.
*Sassy Girl poser, resize 65%, add DS.
~Add Name and Copyright info.
~If not Animating, Merge Visible, resize 402x221px and save as .png
◘
§ Animation §
•
~Copy Merged, Go to AS and Paste as New Animation.
~Back to PSP, X out 1 and Un-X 2. Copy Merged. Back to AS, Paste after Current Frame.
~Do this with 3 as well.
~Make sure your on first frame. Ctrl + D. Animation>Frame Properties, Change to 25.
~Animate
Resize 402 x 221px and save as .gif
Thank You for Trying my tutorial.

Wednesday, January 20, 2010

Love Is In The Air

This Tutorial was written on Jan. 20th, 2009. This is my own creation. Any resemblences is only coincidental. Please do not copy this tutorial in anyway.
•
Supplies:
♦PSP
♦PTU Scrap kit by Stina and Posers by ©Medi @ Designz by Stina HERE
♦FTU Template51 (half way down the page) by Ali @ Designs by Ali HERE
♦EyeCandy 5: Gradient Glow
•
Notes:
This tutorial assumes you have a working, knowledge of PSP.
•
Lesson:
~Open Temp51, duplicate and delete copyright.
~Use Freehand Selection Tool, set to Point to Point. Go around Black Rectangle Back.
~Selections>Modify> Expand by 3
~Copy Paper10 and Paste. Selections>Invert, delete Black Rectangle.
~Go to Circle Back and Selections>Select All>Float>Defloat.
~Copy Paper 29 and Paste, resize 60%. Selections>Invert, delete. Ctrl + D, Delete Circle Back.
~Go to Big Heart Back and Selections>Select All>Float>Defloat.
~Copy Paper 12 and Paste, resize 60%. Move into position. Selections>Invert, delete. Ctrl + D, delete Big Heart Back.
~Go to Inside Heart, Selections>Select All>Float>Defloat.
~Copy Paper11 and Paste, resize70%. Move into Position. Selections>Invert, delete. Ctrl + D, delete Inside Heart.
~Go to Small Circle Back. Selections>Select All>Float>Defloat.
~Copy Paper25 and Paste. Selections>Invert, delete. Ctrl + D, delete small circle frame.
~On all the frames. Work on one at a Time. Selections>Select All>Float>Defloat. Use different papers.
*Small Circle =Paper 22, add DS
*Heart Frame = Paper05, Add DS
*Big Heart Frame = Paper01, add DS
*Rectangle Frame = Paper07, add DS
*Circle Frame = Paper16, add DS
~Selections>Invert, delete. Ctrl + D. Delete small circle, Heart Frame, Big Heart Frame, Rectangle Frame and Circle Frame.
~Copy Bling1 and Paste. Resize 70%. Move to the Bottom.
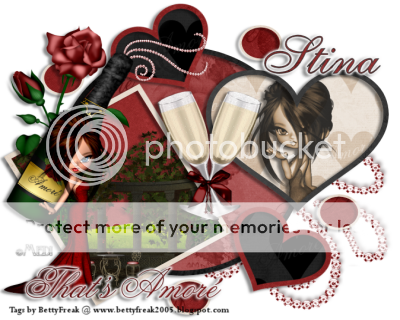
~Copy ChampagneGlass1 and Paste, resize 30%, add DS.
~Copy Champagne and Paste, resize 45%, Free Rotate 30 right. Adjust>Sharpness> Sharpen, Add DS.
~Copy Blong02 and Paste, resize 20%. Move under the champange bottles top at pour spout.
~Copy Rose01 and paste, resize 50%. Move under Chamapgne, add DS.
~Go to Lg. Red Rectangle. Selections>Select All>Float>Defloat.
~Copy Garden02 and Paste, resize 50%. Move Down. Selections> Invert, delete. Ctrl + D, Add DS.
~Go to White heart background. Selections>Select All>Float>Defloat.
~Copy Poser1 and Paste, resize 50%. Selections>Invert, delete. Ctrl + D, add DS.
~Change Blend Mode to Luminance, Opacity to 80.
~Copy Poser2 and Paste, resize 40%. Mirror and Add DS.
~Copy Word Art02 and Paste, resize 30%. Add Gradient Glow and add DS.
~Add New Layer and Floodfill white, move to the bottom.
~Add Copy from Poser Tube
~Add Your name and Copyright into.
~Resize 400x310 px, save as .png.
Thank You for trying my Tutorial.