Showing posts with label Dazzling Scraps. Show all posts

Sunday, February 28, 2010

Pretty Panda

I wrote this tutorial on Feb. 28th, 2010. This is my own creation using scrapkit Pretty Panda by Carol's Crafty Corner @Dazzling Scraps.
§ Supplies §
♦PSP 9, any newer version will do.
♦PTU scrapkit Pretty Panda by Carol's Crafty Corner @ Dazzling Scraps HERE
♦Mura Meisters Copies HERE
♦Mask and Wordart HERE
§ Notes §
This tutorial assumes you have a working, knowledge of PSP and plugins/filters. All drop shadows will be 1, -1, 50, 5.00, black.
§ Lesson §

~Open New 800x800 Image, floodfill white.

~Copy paper 9 and paste, resize 20%.

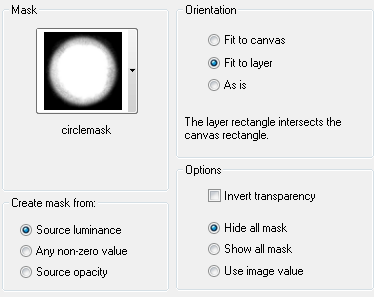
~Apply Mask = Layers>Load/savemask>Load Mask from disk. Merge Group.

~Add DS 1, -1, 50, 5.00, black.

~Copy frame1 and Paste, resize 20%

~Using Magic Wand click inside each frame

~Selections>Modify>Expand 6

~Copy Paper 10 and Paste, resize 15%

Selections>Invert, delete. Ctrl + D, move below the frame.

~Using Magic Wand click inside top left frame.

Selections>Modify>Expand 6

~Copy Panda 1 and Paste, resize 15%.

Selections>Invert, delete. Ctrl +D Add DS.

~Do the same with the other 2 frames, using Panda 3 & 5.

~Merge Layers 4, 5 & 6 together.

~Move below the frame.

~Change Blend Mode of the Panda's to Luminance(L), lower Opacity to 74.

~Add DS to Frames

~COpy Flower1 and Paste, Resize 70%.

~Apply Mura's Copies with the Following Settings.


~Move this layer above your mask layer. Add DS

~Copy Flower2 and Paste, resize 40%.

~Apply Mura's Copies with same settings. Add DS, move this above flower1 layer.

~Copy bow3 and Paste, resize 25%. Add DS and move to Bottom of frames.

~Copy Panda 4 and Paste, resize 25%. Add DS, move to the Bottom of the frame.

~Copy wordart from supploes and Paste.

~Add Name and Copyright info.

~Resize and save as .png

Sunday, February 7, 2010

Spring Is Here

This tutorial was written on Feb. 4, 2010. This is my own creation, using an outside Template and Scrapkit. Any resemblence is only coincidental. Please do not copy, this tutorial in anyway.
§ Supplies §
♦PSP 9 (any newer version will do)
♦Temp. 39 by WickedScraps at Toxic Desire HERE
♦PTU Scrapkit "Wishing for Spring" by Dani @Dazzling Scraps HERE
♦FTU Hellonlegs Tube Mary Mary T-shirt HERE
♦Mask HERE
♦FTU Font Chick HERE
♦AlienSkin EyeCandy Gradient Glow HERE
§ Notes §
All Dropshadow settings, will remain the same 2, -3, 75, 5.00, Black. This tutorial assumes, you have a working knowledge of PSP.
§ Lesson §
~ Open template, duplicate & delete original. Delete copyright & Resize Canvas 800x800.
~Go to Background layer
~Copy Paper 17 and Paste, resize 70%.
~Apply mask, Layers>Load/SaveMask>Load from Disk, with Settings below. Merge Group.
~ Merge Down Leaf 2 and Leaf 1, Do the Same with Leaf 4 and Leaf 3.
~Go to Leaf1. Selections>Select All>Float>Defloat.
~Copy Paper 11 and Paste, resize 70%.
~Selections>Invert, delete. Ctrl + D, Add DS, delete Leaf 1.
~Do the same with Leaf 3, using Paper 10.
~Go to FlowerFill. Selections>Select All>Float>Defloat.
~Copy Paper 15 and Paste, resize 70%.
~Selections>Invert, delete. Ctrl + D, delete FlowerFill.
~Go to Flower Frame. Selections>Select All>Float>Defloat.
~Copy Paper2 and Paste, resize 50%.
~Selections>Invert, delete. Ctrl + D, add DS, Delete FlowerFrame.
~Go to Words. Selections>Select All>Float>Defloat.
~Copy Paper12 and Paste.
~Selections>Invert, delete. Ctrl + D, Add Gradient Glow & DS. Delete words.

~Copy Flower Decoration 3 and Paste, add DS.
~Copy Butterfly 1 and Paste, resize 50%. Lower Opacity to 82.
~Copy Dragonfly 3 and Paste, resize 50%.
~Copy Tube and Paste, add DS.
~Add Name and Copyright Info.
~Crop, resize 400x400px and save as a .png.

Tuesday, January 26, 2010

After The Rain

This tutorial was written by me, on Jan. 26th, 2010. This is my own creation, using Scrap kit by Brandie's Eye Candy. Please do not copy this in anyway.
§ Supplies §
♦PSP 9, any newer Version will do
♦Animation Shop HERE
♦PTU Scrap kit "After The Rain" (Posers included by ©LisaK) by Brandie's Eye Candy HERE
♦Mask17 by AquaRebel 315 HERE
♦Eye Candy5 (6 has the same effects): Impact, Gradient Glow & Nature, Water Drops HERE
♦Font of Choice, I am using Al Sandra. It can be found on Fonts101 HERE
§ Notes §
This tutorial assumes you, have a working knowledge of PSP and AS.
§ Lesson §
~Open a 800 x 800, Transparent Image and floodfill white.
~Copy Paper16 and Paste, resize 70%.
~Apply Mask, Merge Group. Duplicate Once, for a total of 2. Rename mask1 and mask2 (from bottom to top) X out 2.
~Selections>Select All>Float>Defloat.
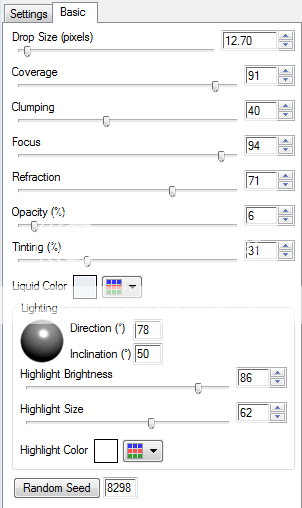
~Apply EyeCandy: Nature/Water Drops with following Settings, to Mask1.

~X out Mask1 and Un X Mask2 and Change Random Seed. Apply to Mask2.
~Ctrl + D
~Copy Frame3 and Paste.
~Copy Daisy1 and Paste, resize 50%. Add DS 0, 0, 60, 6.00 (this will remain the same with all).
~Copy Fleur and Paste, resize 50%, add DS.
~Copy Doodle and Paste, resize 70%, place under flowers, add DS.
~Copy FoldedandCurledRibbon3 and Paste, resize 70%, add DS. Use my Tag for placement.
~Copy Butterfly2 and Paste, resize 50%. Place over Flowers, add DS.
~Copy Heart CircleBling and Paste, resize 60%, add DS. Move this under the Frame.
~Using Magic Wand, Click inside the Frame. Selections>Modify>Expand 6.
~Copy CookiePoser2 and Paste. Selections>Invert, delete. Add DS to poser and frame. Make sure poser is under frame.
~Open Poser1, using Selections Tool , set on Point to Point. Select just the poser. Copy, Ctrl + D.
~Paste and Resize 70%. Place on top Left of Frame, Add DS.
~Using Selections tool again. Go around the copyright. Copy and Paste on tag, resize 130%.
~Add Your Name and Copyright info. Crop.
~If not Animating, resize 400 x 400 and save as .png
§ Animation §
~Copy Merged take to AS and Paste as a New Animation.
~Back in PSP X out Mask1 and Un X Mask2, Copy Merged.
~Take to AS and Paste After Current Frame.
~Ctrl + A, Animation>Frame Properties>30.
~Animate, resize 60% or 400x400 .
Save as .gif
Thank You for Trying my Tutorial.

Tuesday, January 12, 2010

Melt My Heart

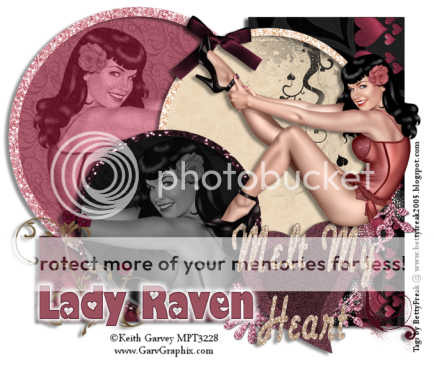
This tutorial was written by me, on Jan. 12th, 2010. This is my own creation, using Template by Missy & Rachel @ Divine Intentions and Scrap kit by Lady Raven @ Dazzling Scraps Store. Please do not copy this tutorial in any way.
Supplies Needed:
♦FTU Temp6 Missy&Rachel Collab at Scraps of Enchantment HERE
♦PTU Scrap kit called Melt My Heart by Lady Raven Creations HERE
♦Tube of choice. I using a PTU Tube by ©Keith Garvey HERE
Notes:
All Drop shadow settings will remain the same. This tutorial assumes you have a working knowledge of PSP.
Lesson:
~Open Temp, duplicate and delete original.
~Delete copy right.
~Rectangle 1, Selections>Select All>Float>Defloat.
~Copy Paper04 and Paste as a New Layer. Selections>Invert, Delete. Ctrl + D, Add DS 3, -6, 45, 6.00, Black. Delete Rectangle 1.
~Do the Same with Rectangle 2, but use Paper20.
~On BlueSwirlBrush, Selections>Select All>Float>Defloat. Add New Raster Layer.
~Change Foreground and Stroke to #9b515e. Floodfill this new layer 3 times. Ctrl + D, Delete Blue Swirl Brush.
~BlackSwirlBrush, Selections>Select All> Float>Defloat. Add New Raster Layer.
~Change Foreground and Stroke to #470d1c, floodfill this new layer. Ctrl + D, Delete BlackSwirlBrush.
~On Pink Circle, Selections>Select All>Float>Defloat.
~Copy Paper10 and Paste as a New Layer. Selections>Invert, Delete.
~Ctrl + D, Delete Pink Circle.
~Do this for Blue Circle, using Paper06 and Black Circle, using Paper16
~Open GlitterTile 1, 2 & 3, Minimize these.
~On Large Frame, Selections>Select All>Float>Defloat. Add New Raster Layer.
~Click on Foreground and Stroke. CLick on the Patterns Tab and Find Glitter Tile 2. Change the Angle to 60 and Scale to 67.
~Floodfill this New layer. Ctrl + D, Delete Large Frame.
~Do the Same for the other 2 frames, Mkaing sure you add a New Rater Layer for both.
~On Med. Frame use Glittertile 3 and Small Frame use GlitterTile 1.
~On Brush1, Selections>Select All>Float>Defloat.
~Copy Paper05 and Paste as a New Layer. Selections>Invert, delete.
~Delete Brush1 and Move the one we just did below the glittered frame.
~Drop shadow all glitter Frames
~Delete the word love and the Heart. Delete Small Heart 1 & 2, also Heart 1 & 2.
~Now lets add some embellishments then the tube.
~Open Border1 and Duplicate it Twice, resize both 20%. Close the original.
~On the first one go to image>Free Rotate>Left 90, Copy.
~Click on the Black Rectangle, Selections>Select All>Float>Defloat. Paste Border and Move to the outer edge of Rect., Selections> Invert, delete.
~Copy the other Border and do the Same with the Pink Rectangle.
~Make sure Your back at the top of layer palette.
~Copy flower doodle2 and Paste, resize 30%. Move to the left of bottom circle.
~Copy flower doodle3 and Paste, resize 70%, move this layer below the cirlces.
~Copy wordart4 and paste, resize 40%. Place to the Bottom right.
~Add DS to all.
~On top Left circle, Selections>Select All>Float>Defloat.
~Copy Tube and Paste as a New Layer. Selections>Invert, delete.
~Change Blend Mode to Luminance (L) and Opacity to 58.
~Do the same with bottom Black Circle.
~Add Tube one more time, resizing if needed and move to top. Add DS.
~Add Name and Copyright info.
~Merge visible
~Crop is needed
~Resize 433x382 px.
Thank You for Trying this Tutorial

Wednesday, December 23, 2009

Key To My Heart

This tutorial was written on Dec. 23rd, 2009. This is my own creation, Using Addictive Pleasure's Forbidden kit. Please do not copy this tutorial in anyway.
Supplies Needed:
♦PSP I am using V.9, any version will do.
♦PTU Scrap kit called Forbidden by Addictive Pleasures HERE
♦FTU Template 35 by Babe's Designz HERE
♦FTU Font's Mary Monroe Script HERE & Popsies HERE
♦PTU Plugin Alien Skins Gradient Glow HERE (This can be achieved also with a DS, settings
0, 0, 70, 15.00, White)
Notes:
This tutorial assumes, you have a working knowledge of PSP.
Lesson:
Open Temp. 35, Duplicate, Delete Orginal. On duplicated temp., delete copyright.
~
Transmisson layer, Selections>Select All>Float>Defloat.
~
Copy Paper 10 and Paste as a New Layer. Selections> INvert, delete, Ctrl + D. Delete the transmisson layer.
~
Circle Layer, Selections>Select All> Float> Defloat.
~
Copy Paper 11 and Paste as a New Layer. Selections> INvert, delete, Ctrl + D. Add Gradient Glow with Following Settings.
~
Delete Circle.
~
Circle Line, Selections>Select All>Float>Defloat.
~
Copy Paper 7 and Paste as a New Layer. Selections> INvert, delete, Ctrl + D. Delete Circle Line.
~
Add Gradient Glow changing glow radiues to 5.00
~
Doodle Layer, Selections>Select All>Float>Defloat.
~
Copy Paper 2 and Paste as a New Layer. Selections>INvert, delete, Ctrl + D. Add DS, Delete Doodle.
~
Add Elements of Choice, May need to rotate some of the elements. Add DS, resizing will be necessary.
~
Add Name and Copyright info.
~
Resize 400x350, save as .png. Thank You for trying my tutorial.

Sunday, December 13, 2009

Glamorous


This Tag was made using a PTU Kit by Angel's Designz and Template 21 by Elegantly Wasted.

I Know You Want Me

I wrote this tutorial on Dec. 13th, 2009. This is my own creation, using a Template by Elegantly Wasted and Scrap Kit by Angels Designz. Please not copy this tutorial in any way.
Supplies Needed:
♦PSP
♦Tube of Choice. I used the Artwork of ©Keith Garvey. You can purchase a License and the Tube at My PSP Tubes (do not use without the license) HERE
♦PTU Scrap Kit called Paparazzi by AngelsDesignz HERE
♦FTU Template EW0021 at Elegantly Wasted HERE
♦Word Art by Me HERE
Notes:
This tutorial assumes you have a working knowledge of PSP.
Lesson:
Open Template, Duplicate, delete copyright.
~
Resize Canvas (image> Canvas size) 725x725.
~
Floodfill white bg layer with more white.
~
Layer 10, Selections>Select All> Float> Defloat. Copy Paper6, Paste as a New Layer, Resize 50%, Selections>Invert, Delete. Ctrl + D. Add DS -2, -2, 50, 10.00, Delete Layer 10.
~
Layer 9, Selections>Select All> Float>Defloat. Copy Paper4, Paste as a New Layer. Selections>Invert, Delete. Ctrl + D. Add DS and Delete Layer 9.
~
Layer 8, Selections> Select All>Float>Defloat. Copy Paper18, Paste as a New Layer. Resize 50%. Selections>Invert, Delete. Ctrl+D. Add DS and Delete Layer 8.
~
Layer 6, Selections>Select All> Float>Defloat. Copy Paper12, Paste as a New Layer. Resize 70%. Selections> Invert, Delete. Ctrl+D. Add DS and Delete Layer 6.
~
Merge Down Layer 2 and 3. Click inside, both black rectangles. Copy Paper17, Paste as a New Layer. Resize 70%. Selections>Invert, Delete, Ctrl+D. Add DS and Delete Layer 3.
~
Delete Text & Text 2 Layers.
~
Copy Camera2, Paste as a New Layer. Place in the Middle of black star backgrounds, Add DS.
~
Copy High Heel, Paste as a New Layer, resize 50%. Add DS, place in Left bottom corner.
~
Copy Perfume, Paste as a New Layer, resize 30%, add DS. Place over High Heel.
~
Copy Word Art, Paste as a New Layer.
~
Copy Tube, Paste as a New Layer, over Left Black star Bg. Rize if Needed, Add DS.
~
Using Selection tool, set on Rectangle, draw around Right Black Star Bg.
~
Use Tube again. This time do not resize. Place over Right Black Star Bg. Selections>Invert, delete, Ctrl + D. Change to Luminance (L).
~
Add Name and Copyright Info.
~
Merge Visible and Crop
~
Resize 400x300 px
~
Save .png
Thank You for trying my Tutorial.

Saturday, November 21, 2009

Autumn Beauty


This Tutorial was Written on Nov. 21, 2009. This is my own creation using, the artwork of ©Rion Vernon and Scrapkit by Schnegge @ Dazzling Scraps called Autumn Romance. Please do not copy this tutorial in anyway.


Supplies Needed:


♦PSP, I am using V.9 (but any version will do)

♦ Tube of Choice, I am a PTU Tube by Rion Vernon at CILM (do not use without license) HERE

♦FTU Template #37 by Lacarolitas HERE

♦Mask that I will supply (if this is yours, please let me know I will give proper credit) HERE

♦PTU Scrap Kit called Autumn Romance by Schnegge @ Dazzling Scraps HERE


Notes:


This tutorial assumes, you have a working knowledge of PSP.


On to the Lesson:


~Open Template. Duplicate it (Shift + D), close orginal, delete copy right, background and flowers.


~Add a New Raster Layer and send to the bottom and floodfill with white.


~On Raster 1. Selections> Select All> Float> Defloat


~Add a New Rater Layer


~Copy Paper08 and Paste Into Selection, Selections> None and delete Raster 1.


~On Raster 5 Selections> Select All> Float> Defloat.


~Copy Paper 12 and Paste as a New Layer. Selections> Invert, delete. Select None.

Add DS 4, -5, 60, 10.00. Delete Raster 5.


~On Raster 4 Selections> Select All> Float> Defloat.


~Copy Paper06 and Paste as a New Layer. Selections None. Add DS, delete Raster 4.


~On Raster 3, Selections> Select All> Float> Defloat.


~Copy Paper20 and Paste as a New Layer. Selections> Invert, delete. Selections> None. Add DS and delete Raster 3.


~On Raster 2, Selections> Select All> Float> Defloat.


~Copy Paper13 and Paste as a New Layer. Selections> Invert, delete. Selections> None. Delete Raster 2.


~Copy Tube and Paste as a New Layer. Resize if needed. I resized mine 65%. Add DS.


~Copy Paper09 and Paste as a New Layer. Move this layer right above Raster 8. Add Mask. Layers> Load/Save mask> Load Mask from Disk, Merge Group.


~Copy Elements of Choice, you can use mine for example. Add DS to All.


~Add name & Copyright, crop, merge visible, resize with settings below:


~Save as a .png


Monday, November 2, 2009

Forever Autumn

I wrote this Tutorial on Oct. 31, 2009. This is my own Creation, using a scrap kit by Classie Creations. Please do not copy this tutorial in anyway. Thank You.
Supplies Needed:
♦ PSP, I am using V.9 (any newer version will do)
♦PTU scrap kit by Classie Creations called Samhain (full Size) HERE
♦Tube of Choice. I am using the beautiful Artwork of ©Joel Adams (do not use without purchasing a license) HERE
♦FTU Template by Vix. Template set 21-25 HERE
♦FTU Mask, I will supply (if this is your creation please let me know so I can give proper credit) HERE
Notes:
This tutorial is written with the assumption, you have a working knowledge of PSP.
Lesson:
>Open Temp, delete copyright and chande the canvas size to 800x800.
>On background layer un-x and floodfill with white.
>Copy paper6 and Paste as a New Layer, above the background layer.
>Add Maski WynterMask1903087, Merge Group and resize 80%, Add Drop shadow.
V3, H-3, O 49.00, B 10.00
>Delete both leaves layer.
>Go to your frame fill layer and copy paper7. Go to Selections> Select All> Float> Defloat. Paste your paper as a New Layer, resize 70%. Selections> Invert, delete. Selections>None. Add Drop Shadow. Delete frame fill layer.
>On Frame Fill Sides. Selections>Select All> Float> Defloat. Copy paper1 and Paste as a New Layer. Selections> Invert, delete. Selections> None. Add Drop shadow.
Delete frame fill sides.
>On Autumn Word Art. Selections>Select All> Float>Defloat, copy paper5 and Paste as a New Layer.
>With Autumn still selected move paper5, above the Autumn Glow layer. Selections> Invert, delete. Selections> None, add drop shadow.
>Drop shadow the word forever & frame layers.
>Add Embellishments of choice, resize if needed. Add drop shadow to each. Use my for example.
>Copy Tube of choice and Paste as a New Layer, resize if needed, add drop shadow.
>Duplicate this layer and resize to a bigger size, then the orginal.
>Move below Raster 2 layer
>On Raster 3 layer, Selections> Select All> Float>Defloat. Selections> Invert, Delete. Change this fromnoraml to Hard Light in layer palette. Add Drop shadow.
>Add name & copyright info.
>Crop and Resize to 400x400 px.
>Merge Visible
>Save as .png
Viola Your Done,
Thank You for trying my tutorial.