Sunday, June 27, 2010
Summer Days
Posted by Betty Freak at 9:10 PM 0 comments
Labels: Keith Garvey, Scraps by Randy's Sin, Templates
Saturday, June 26, 2010
Believe
 This is my own Creation using Randy's Scrap kit www.randyssin.blogspot.com and Template by Vix at www.vixpsp.blogspot.com
Posted by Betty Freak at 9:38 PM 0 comments
Labels: Scraps by Randy's Sin, Templates
Thursday, June 17, 2010
Lazy Day Scrap Kit
Posted by Betty Freak at 8:30 AM 0 comments
Labels: Mad Hatter Scraps, Templates
Thursday, April 29, 2010
Taking a Break
Things are a little out of sorts here at home. I am going to take a break for just a bit, while I get my house and life in order. Thank You for being faithful to my blog.
Posted by Betty Freak at 11:59 PM 0 comments
Wednesday, March 31, 2010
He Is Risen
 This tutorial was written on March 31st, 2010. This is my own creation using Tootypups Easter Dawn. Please do not copy this tutorial in any way.
Posted by Betty Freak at 9:47 PM 0 comments
Labels: Pampered Pups CT, PTU Tuts, Tootypup
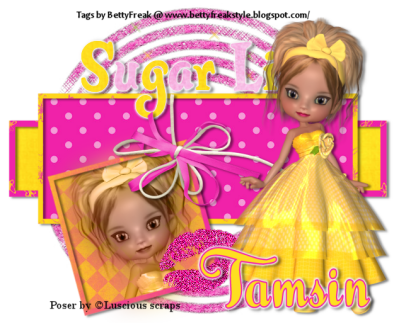
Sugar Lips
 This tutorial was written on March 31, 2010. This is my own creation using kit Pink Lemonade by Tasmin McAtee Studios. Please do not opy in any way.
◘
§ Supplies Needed §
•
♦PSP 9 any version will do
♦Template 112 by Beth @ Blissyfully Beth HERE
♦PTU kit by Tasmin McAtee Studios HERE
♦Font Used ScarlettRibbons
♦Gradient Glow by Alien Skin
◘
§ Lesson §
•
~Open Template, dupliate, close orginial. Delete copyright.
~Raster 1 change Opacity to 100 and floodfill white.
~Blue rectangle Selections>Select All> Float>Defloat.
~Copy paper 3 and paste, resize 80%. Selections>Invert, delet. Ctrl + D, delete blue rect.
~On the black frame rect, blue frame, Pink square, white frame. Do the Same as above.
Changing paper and adding DS of Choice to the frames (Black, Blue and White).
~On Word art, using magice wand click inside every other letter, starting with S.
~Copy paper3 and paste. Selections> Invert, delete.
~Back on wod art, click inside every other letter strating with U.
~Copy Paper 2 and paste. Selections>Invert, delete, add DS.
~Merge those 2 layers together.
~On Square, Selections>Select All>Float, Defloat.
~Copy poser Lemondrop3 and Paste, resize 70%. Selections>Invert, delete.
~Duplicate this layer.
~On orginal Adjust> blur> gaussian blur 20.00
~On duplicated layer hange blend mode to Luminance (L).
~Copy Poser lemondrop and paste resize 60%, add DS.
~Add other elements of choice.
~Add name, copy right info, crop, resize 394 x 323 px. and save as .png
Posted by Betty Freak at 12:05 PM 0 comments
Labels: Kreative Kreations Korner, PTU Tuts
Beautiful Life
 This tutorial was written by me, on March 31, 2010. This is my own creation using Stina's Scrap kit Flutterfly Fae. Any resemblence is only coincidental. Please do not copy this tutorial in any way.
Posted by Betty Freak at 8:57 AM 0 comments


