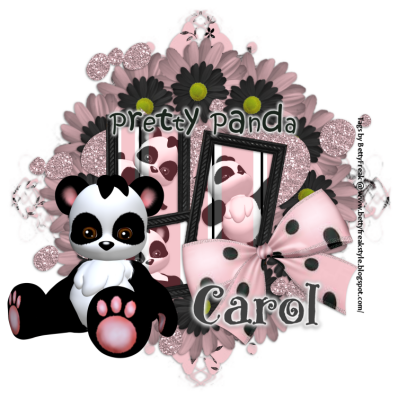
 I wrote this tutorial on Feb. 28th, 2010. This is my own creation using scrapkit Pretty Panda by Carol's Crafty Corner @Dazzling Scraps.
~Open New 800x800 Image, floodfill white.
~Copy paper 9 and paste, resize 20%.
~Apply Mask = Layers>Load/savemask>Load Mask from disk. Merge Group.
~Add DS 1, -1, 50, 5.00, black.
~Copy frame1 and Paste, resize 20%
~Using Magic Wand click inside each frame
~Selections>Modify>Expand 6
~Copy Paper 10 and Paste, resize 15%
Selections>Invert, delete. Ctrl + D, move below the frame.
~Using Magic Wand click inside top left frame.
Selections>Modify>Expand 6
~Copy Panda 1 and Paste, resize 15%.
Selections>Invert, delete. Ctrl +D Add DS.
~Do the same with the other 2 frames, using Panda 3 & 5.
~Merge Layers 4, 5 & 6 together.
~Move below the frame.
~Change Blend Mode of the Panda's to Luminance(L), lower Opacity to 74.
~Add DS to Frames
~COpy Flower1 and Paste, Resize 70%.
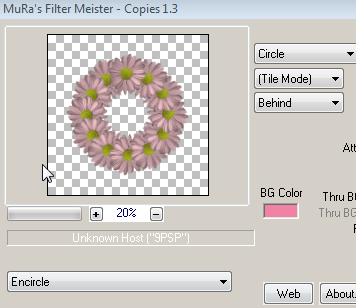
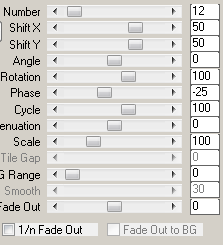
~Apply Mura's Copies with the Following Settings.

 ~Move this layer above your mask layer. Add DS
~Copy Flower2 and Paste, resize 40%.
~Apply Mura's Copies with same settings. Add DS, move this above flower1 layer.
~Copy bow3 and Paste, resize 25%. Add DS and move to Bottom of frames.
~Copy Panda 4 and Paste, resize 25%. Add DS, move to the Bottom of the frame.
~Copy wordart from supploes and Paste.
~Add Name and Copyright info.
~Resize and save as .png


0 comments:
Post a Comment